How to Remove Ceramic Floor Tile
Ceramic flooring is one of the most popular tiling options for homeowners across the country thanks to its durability and clean, simple look. However, no matter how useful your ceramic tiling may be, you might find yourself wanting a change. In these circumstances, many homeowners want to remove their tiling, but are unsure of the process and don’t know if they’ll be able to handle it themselves. Fortunately, with a few tips beforehand, removing ceramic tile is easy, even for an inexperienced homeowner. Read on to learn the process of ceramic floor tile removal, and find out how a flooring expert can give you advice and help make the process that much easier.
Make Sure You Have the Right Tools
The most important aspect of any home improvement job is having the right tools, and this is particularly true when your project has to do with ceramic floor tile removal. For ceramic floor tile, there are a few tools you should have at your disposal to make the process as easy as possible. If you have the funds, you should invest in an automatic chiseling tool, which will make the process of breaking up your tiles that much easier. However, if money is an issue, and you don’t mind using a little elbow grease, you can skip the automatic chisel and go with a regular chisel alongside a hand-held sledgehammer. Finally, you’ll need a good, sturdy broom for the clean-up.
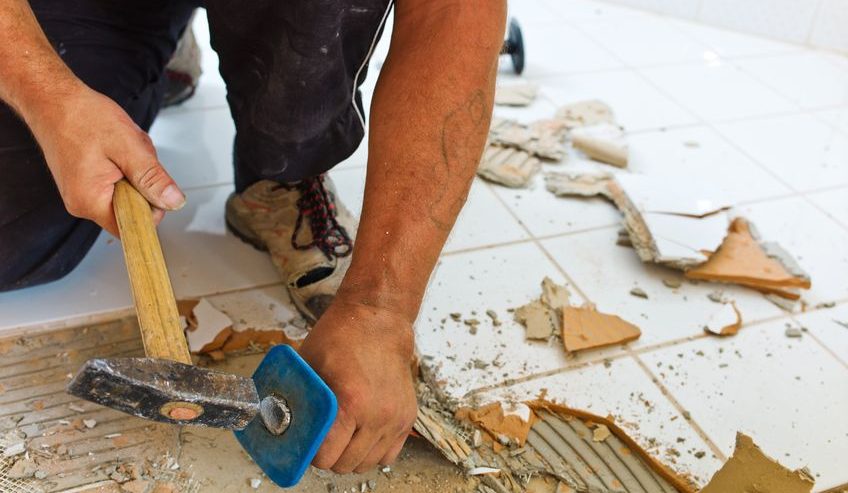
Break Up the Tiles and Remove the Debris
Once you’ve got the right tools, it’s time to get started with the demolition process. Start hitting your tile with your sledgehammer and chisel at an angle. It might take a couple of tries, but eventually, you’ll find the right angle to cause maximum damage. Very carefully break up all the tiles on your floor until pieces as small as possible. Because ceramic tile is often very sharp, it is important to take special care not to cut yourself while breaking up the tiles. After the tiles have been completely broken up, you should use a sturdy shovel and garbage bag to clear them off of the floor. When the floor is clear of debris, you can complete the clean-up process.
Complete the Clean-Up Process
Although you have removed the bulk of your tile, there are still likely a few remaining places that need some work. Scan your floor, and take care of any straggling ceramic pieces by using your manual chisel. Next, you should use a smoother of some sort to even out the flooring as much as possible. Finally, use your broom, or a capacity vacuum cleaner if you have one, and remove all the leftover dust and debris from the flooring. Congratulations, because you’ve just successfully completed the process of removing your ceramic floor tile!
Consult a Ceramic Floor Tile Removal Expert
As you can see, removing your ceramic floor tile is not the difficult process that many people believe it to be. With the right tools, a plan of action and a little determination, you can remove your ceramic floor tile all by yourself. However, if you still want some professional help, then you deserve the best in the business. To find flooring experts who can help you with ceramic floor tile removal quickly and easily, you need to sign up with ServiceWhale. At ServiceWhale, we are dedicated to helping our customers find the right contractors in their city at an unbeatable price. Start using our powerful request wizard today and instantly connect with the best contractors your city has to offer.


Comments
Leave a Comment